We've all be furiously creating and this week is the big reveal week :) Each day this week Monique has featured each of our projects on her blog and the full posts can be found on our individual blogs. It's so much fun to see what everyone is creating! Thanks Monique for the challenge!
When I got my package of materials I knew right away I wanted to create something that would be practical - either now or one day. I brainstormed a list of possible projects but the one that I wanted to try was a diaper clutch. No, I don't need this now lol, but someday down the road I hope to! I've seen these on a few websites in the past while so I thought I'd try it out! The sites I've seen describe these clutches as being a handy way to keep an extra diaper and wipes in your purse or a convenient way to pass off a diaper and wipes to your husband when he takes the baby to change them. A friend of mine uses hers to keep an extra set of clothes in her purse for her girls. Sounds like a handy thing to have around!
 |
| Our Crafting Supplies: Vintage fabric, two doilies, bakers twine & a button |
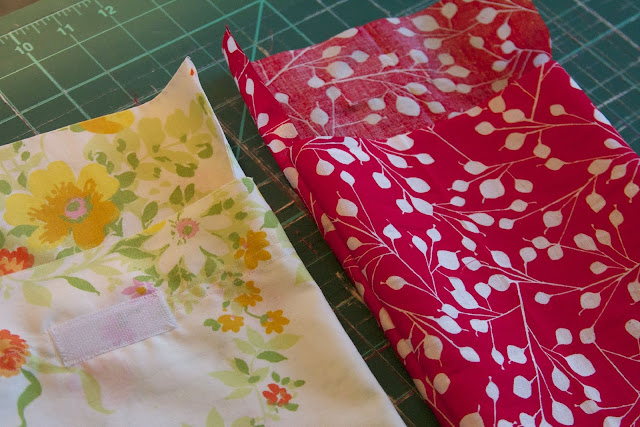
While the bulk of or project was to be from the supplies provided, Monique gave us the freedom to add in a few extras if we needed. I added this fun red fabric to use as the lining of the clutch. I also cut two pieces of the lining fabric the same dimensions as my vintage fabric and then sewed each together to create a "bag". A strip of velcro on each "bag" was added to hold the finished project closed.
After trimming the bottom corners and the top flap at a slight angle, both "bags" were turned inside out. I put the lining inside of the vintage "bag" and sewed along the top of the bag, starting about two inches from the center, all the way around along the top of the flap and back down to the top of the bag. I left about a two inch hole that I'd use to turn the "bags" out to their right positions.
I'm sorry I don't have a picture of the "turning out" process, but it went something like this:
Once I was finished sewing the top of the "bags" together, I gently pulled the red fabric right side out through the two inch hole I left. I then turned the vintage fabric right side out and then stuffed the red lining fabric inside the vintage "bag" that is now turned right side out. (It really is a simple process, just might sound a tad confusing sorry!) What you're now holding is a diaper clutch with all the fabric turned the right way like this:
I then went around the top of the flap as well as the top of inside of the bag with a top stitch. This will hold everything together nicely as well as close up that two inch hole you left to be able to turn the bags out the right way.
Now to embelish a bit!
I used the bakers twine to do a blanket stitch around the top flap of the clutch...
I carefully separated the two doilies and sewed a piece of fabric behind each one and added a button to create flowers...
added them to the clutch...voila!
I made a couple more of these for my neighbor who has recently had twins, so I borrowed the contents of those for this shot just to give you an idea of how things fit!
This same design could easily be used for a lunch bag, a kids travel kit , or just about anything you could think of! (I used this tutorial from Diary of a Quilter to get me started)
Don't forget to check out Pocket Full of Whimsy to see what the other ladies have created!


Wow what a fun project! And your end result looks great! Love it!
ReplyDelete